Operating Instructions
Every winch in the range operates the same way. Read the whole procedure before using the winch on a load, and do not exceed the 2.5 ton tensioning limit.
Parts you need to know
| Part | Function |
|---|---|
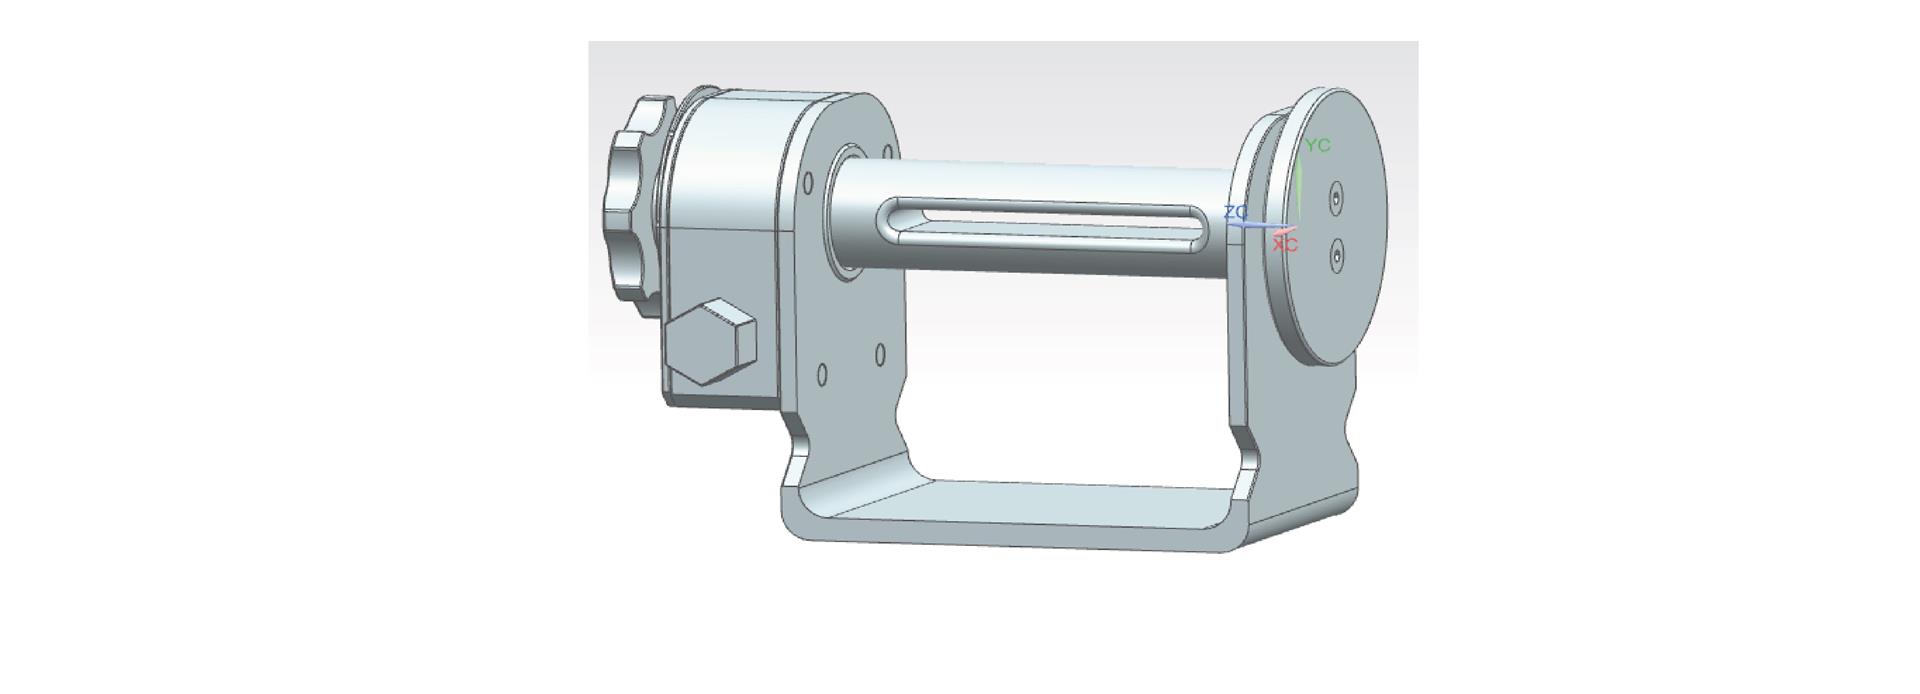
| Mandrel | The drum. The strap threads through its slot. |
| Big handwheel | Turned by hand to take up slack. No tool needed. |
| Small handwheel | Locks and releases the mandrel. Its position shows the lock state. |
| Gear body | Houses the 22:1 worm gear. Has the 24.8 mm handle socket. |
| Tension bolt | Sets gear preload. Factory-set; do not adjust in service. |
The full cycle
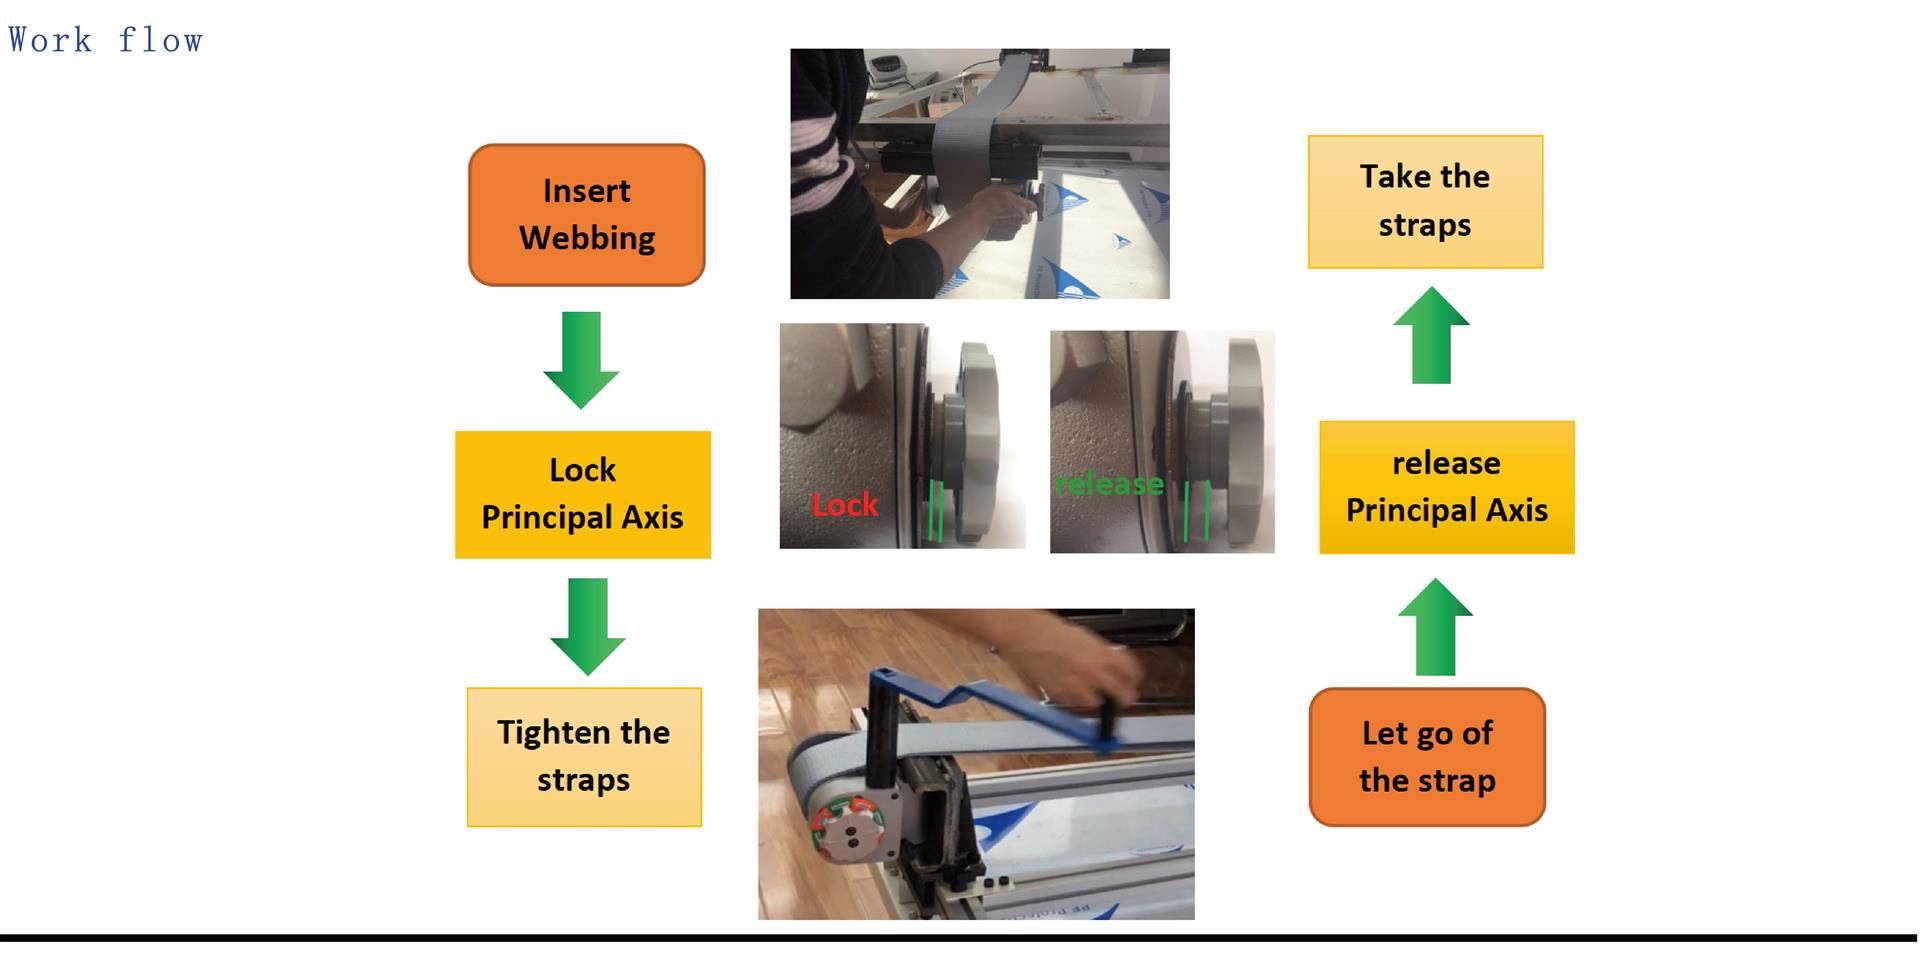
- Insert webbing through the mandrel slot.
- Lock the mandrel using the small handwheel.
- Tighten the strap with the winch handle.
- Let go of the strap — the gear holds the tension.
- Release the mandrel when unloading.
- Take the straps off the load.
Tensioning, step by step
- Take up slack by hand. Turn the big handwheel to draw the strap through the mandrel until the slack is gone. This stage needs no tool.
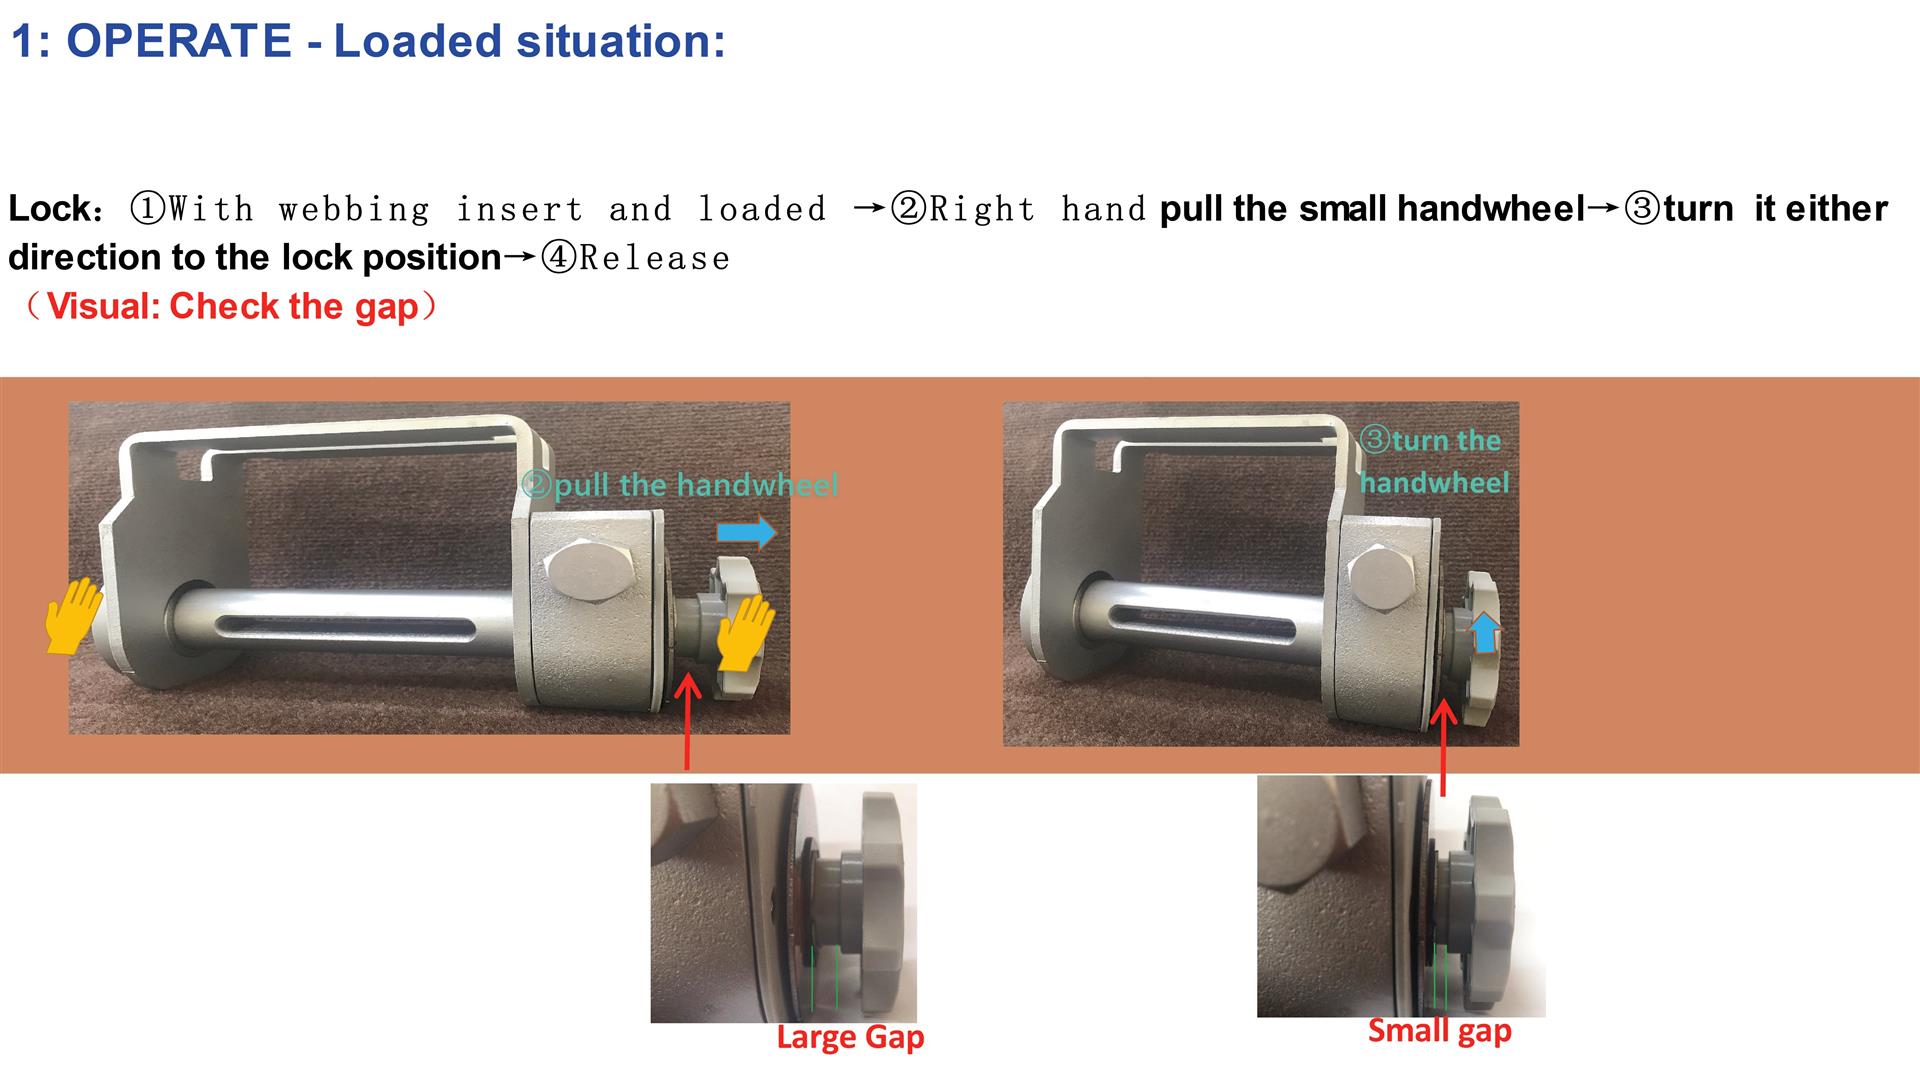
- Engage the gear. Pull the small handwheel outward and rotate it to the lock position, then let it go.
- Tension with the handle. Fit the winch handle to the 24.8 mm socket and turn until the strap reaches working tension. Keep tensioning force below 2.5 tons.
- Confirm the lock. Check the gap at the small handwheel — see below.
Locking: check the gap
The gap between the small handwheel and the gear body tells you the state of the winch without touching it.
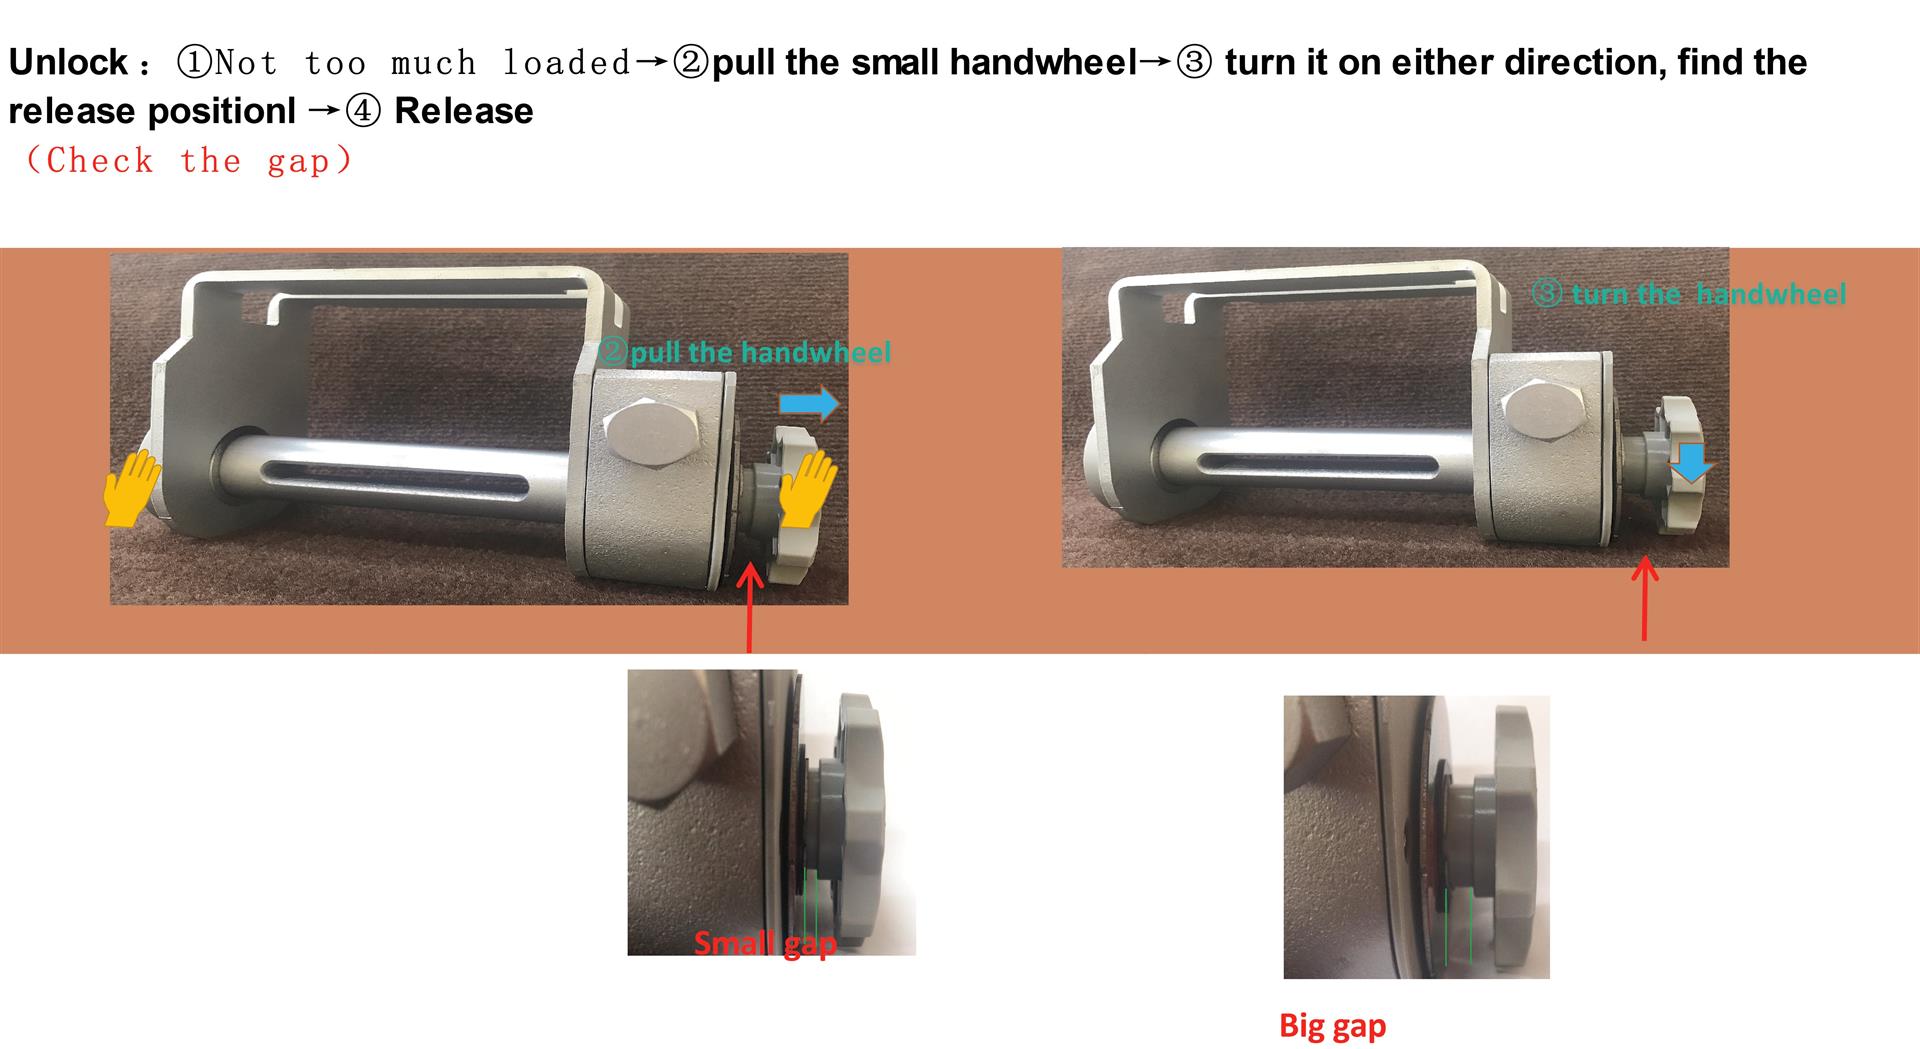
- Small gap — mandrel locked.
- Large gap, small handwheel standing clear of the gear body — released.
Make this part of the walk-around. It is faster and safer than testing by hand.
Releasing
Take the load off the strap with the handle before releasing the mandrel. Then pull the small handwheel, turn it in either direction to find the release position, and let it go. The gap opens.
Do not attempt to release the mandrel while the strap is still under working tension.
Troubleshooting
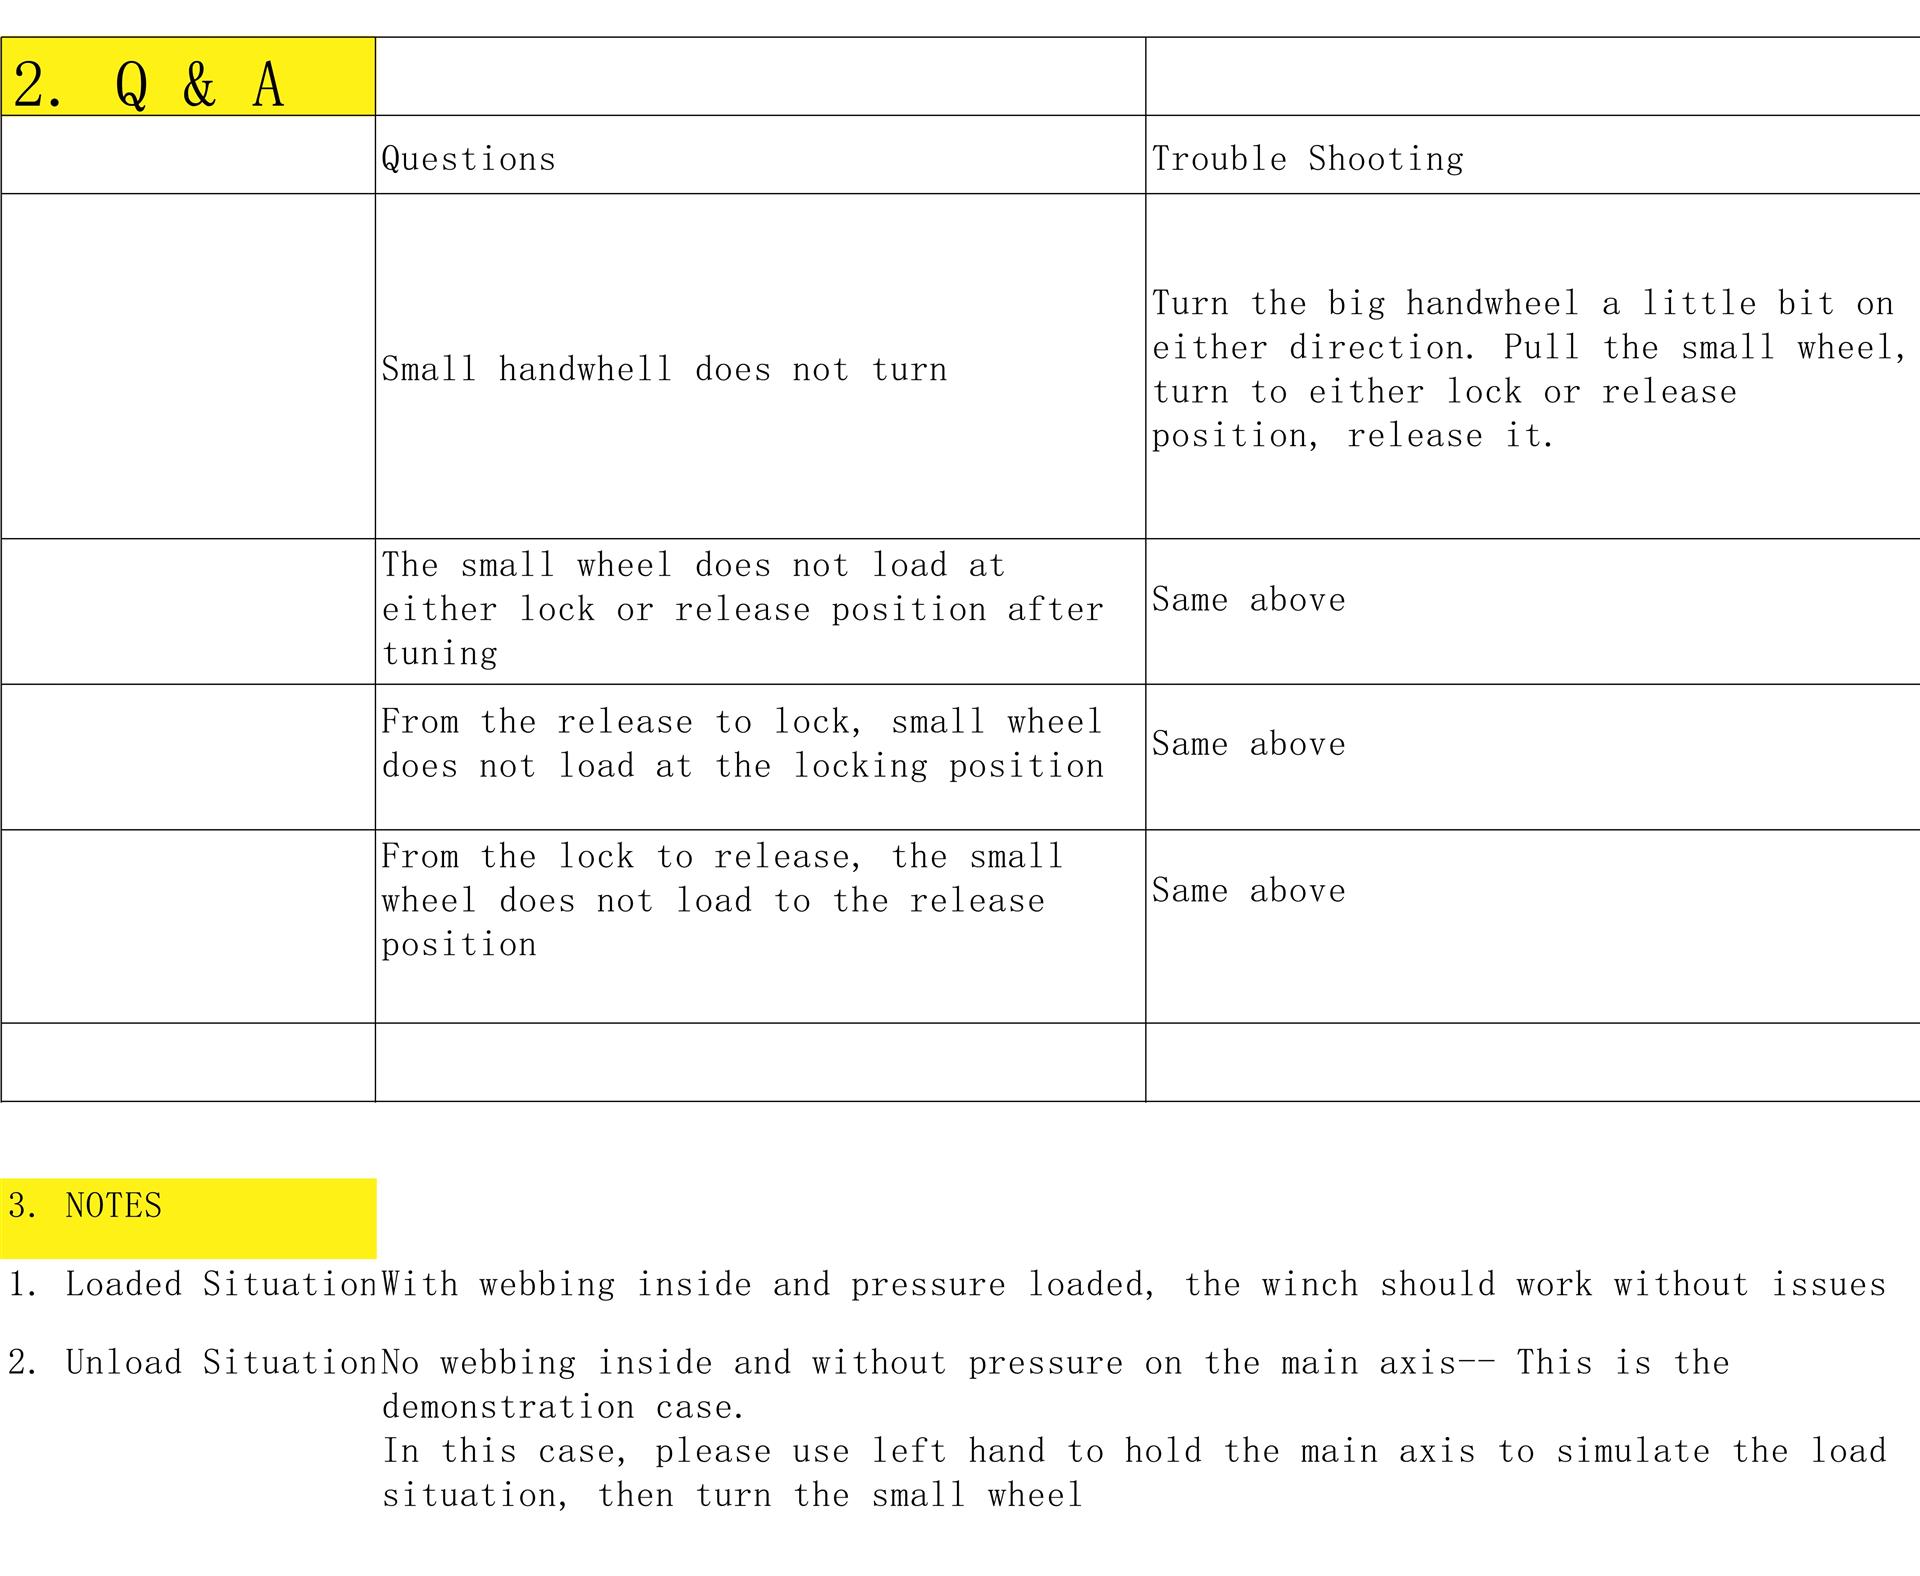
Four different symptoms have the same cause and the same fix: the locking teeth are loaded and cannot move.
| Symptom | Fix |
|---|---|
| Small handwheel does not turn | Turn the big handwheel slightly in either direction to relieve the load on the teeth. Then pull the small handwheel, turn it to either the lock or release position, and let it go. |
| Small handwheel does not seat at either position after adjustment | |
| Going from release to lock, it will not seat at the lock position | |
| Going from lock to release, it will not seat at the release position |
Loaded vs unloaded behaviour
Loaded — webbing fitted and pressure on the mandrel: the winch should operate without difficulty. This is the design condition.
Unloaded — no webbing, no pressure on the main axis: this is a demonstration case only. The locking teeth have nothing to seat against. To demonstrate the winch on a bench, hold the mandrel with one hand to simulate load, then turn the small handwheel.
Service
- Grease: Showa Shell Alvania RA-J, rated −40 °F to 266 °F (−40 °C to 130 °C). Valvoline Full Synthetic Moly Fortified is an accepted alternative.
- Straps: inspect before every use. Replace any strap that is cut, abraded, or out of service.
- Load: never exceed the rated working load limit.
- Tools: use only the winch handle or ratchet wrench on the gear socket. A pipe, cheater bar, or impact tool can damage the gear set and voids the warranty.
Common questions
- The small handwheel will not turn. What do I do?
- Turn the big handwheel slightly in either direction to relieve the load on the locking teeth, then pull the small handwheel, turn it to either the lock or release position, and let it go. The same fix applies to every variation of this symptom.
- How can I tell whether the winch is locked or released?
- Look at the gap between the small handwheel and the gear body. A small gap means the mandrel is locked. A large gap, with the small handwheel standing clear of the gear body, means it is released. The state can be read at a glance during a walk-around.
- Why does the small handwheel behave differently on the bench than on a trailer?
- The mechanism is designed to operate under load. With no webbing fitted and no pressure on the main axis, the locking teeth have nothing to seat against. To demonstrate the winch unloaded, hold the mandrel with one hand to simulate the load, then turn the small handwheel.
- What grease should be used?
- Showa Shell Alvania RA-J, rated from -40 F to 266 F. Valvoline Full Synthetic Moly Fortified grease is an accepted alternative.
For how the rated capacity feeds a securement calculation, see DOT 49 CFR 393 cargo securement.